Step 1: Get Started
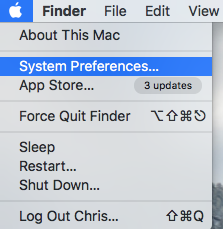
Click on the Apple Menu icon (from the top left of your screen) and select System Preferences.

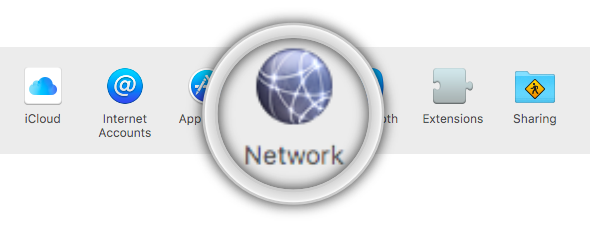
In the System Preferences window, click on Network.

Step 2: Change Network Settings
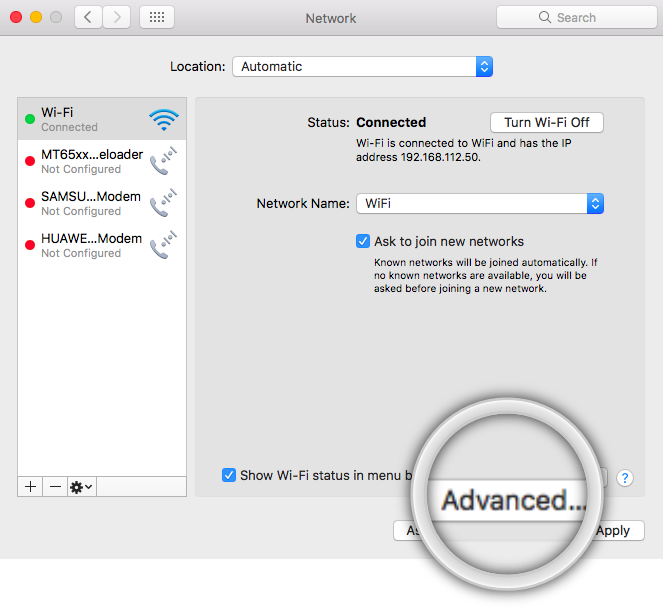
Now, select your active network adapter (Ethernet or Wi-Fi) from the left panel.
Note: If you’re connected to the internet wirelessly, the corresponding adapter should be “Wi-Fi“. However, if you’re connected to the internet via a LAN cable instead, the corresponding adapter should be “Ethernet“.
With your active network adapter selected, click on Advanced.

Step 3: Disabling IPv6
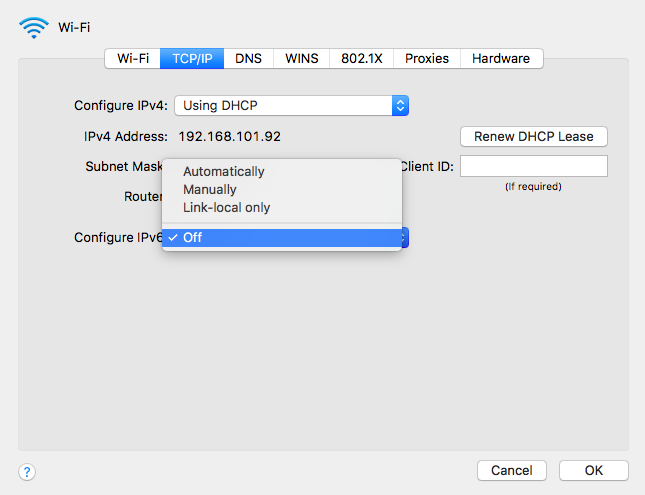
In the Advanced menu, click on the TCP/IP tab.
Click on the Configure IPv6 drop-down menu and set it to Off.
Click on OK to confirm and Apply to save the changes.

Step 4: Restart Computer
Now that IPv6 has been disabled on your computer, kindly restart your computer and the internet router for the changes to take affect.
Once restarted, try connecting to our VPN again.
Missing Option To Turn IPv6 Off?
If you don’t have the option to turn off IPv6, you could try to run a command through the Terminal application instead.
To do so, kindly follow the steps below:
- Open Finder.
- Click on Applications.
- Open the Utilities folder.
- Double Click on Terminal.app.
With the Terminal application open, enter the command below according to your connection type (Wi-Fi or Ethernet).
- If you’re connected via Wi-Fi (Wireless Connection)
networksetup -setv6off Wi-Fi
- If you’re connected via an Ethernet (Wired connection)
networksetup -setv6off Ethernet
When entering the command, this is how it should look like on Terminal. (Refer to the image below)

Once you execute this command, you may need to enter your Mac user password to authorise the changes.

